Visualize & Analyze Shopify Data in Looker Studio

Use Looker Studio as a reporting destination for Shopify data collected with OWOX Data Marts. Store raw e-commerce data in a data warehouse, then reuse it in Looker for analysis, reporting, and forecasting.

Visualize & Analyze Shopify Data in Looker Studio

Analyze Shopify Data in Looker Studio — Clean, Structured, and Reusable

You define where Shopify data is stored, how it’s structured, and how often it updates — and reuse it across Looker Studio, Spreadsheets and AI Insights.

Step 1: Select a Data Storage

Start by connecting a data storage where your Shopify data will be collected. This is necessary so you connect trusted data to Looker Studio.

  • Choose a data warehouse such as BigQuery or Snowflake
  • Store raw orders, products, customers, and transactions
  • Keep full ownership and control over your e-commerce data

This storage becomes the foundation for all Shopify reporting.

Step 1: Select a Data Storage
Connect Data Warehouse
Step 1: Select a Data Storage
Step 2: Create Shopify Data Mart(s)

Step 2: Create Shopify Data Mart(s)

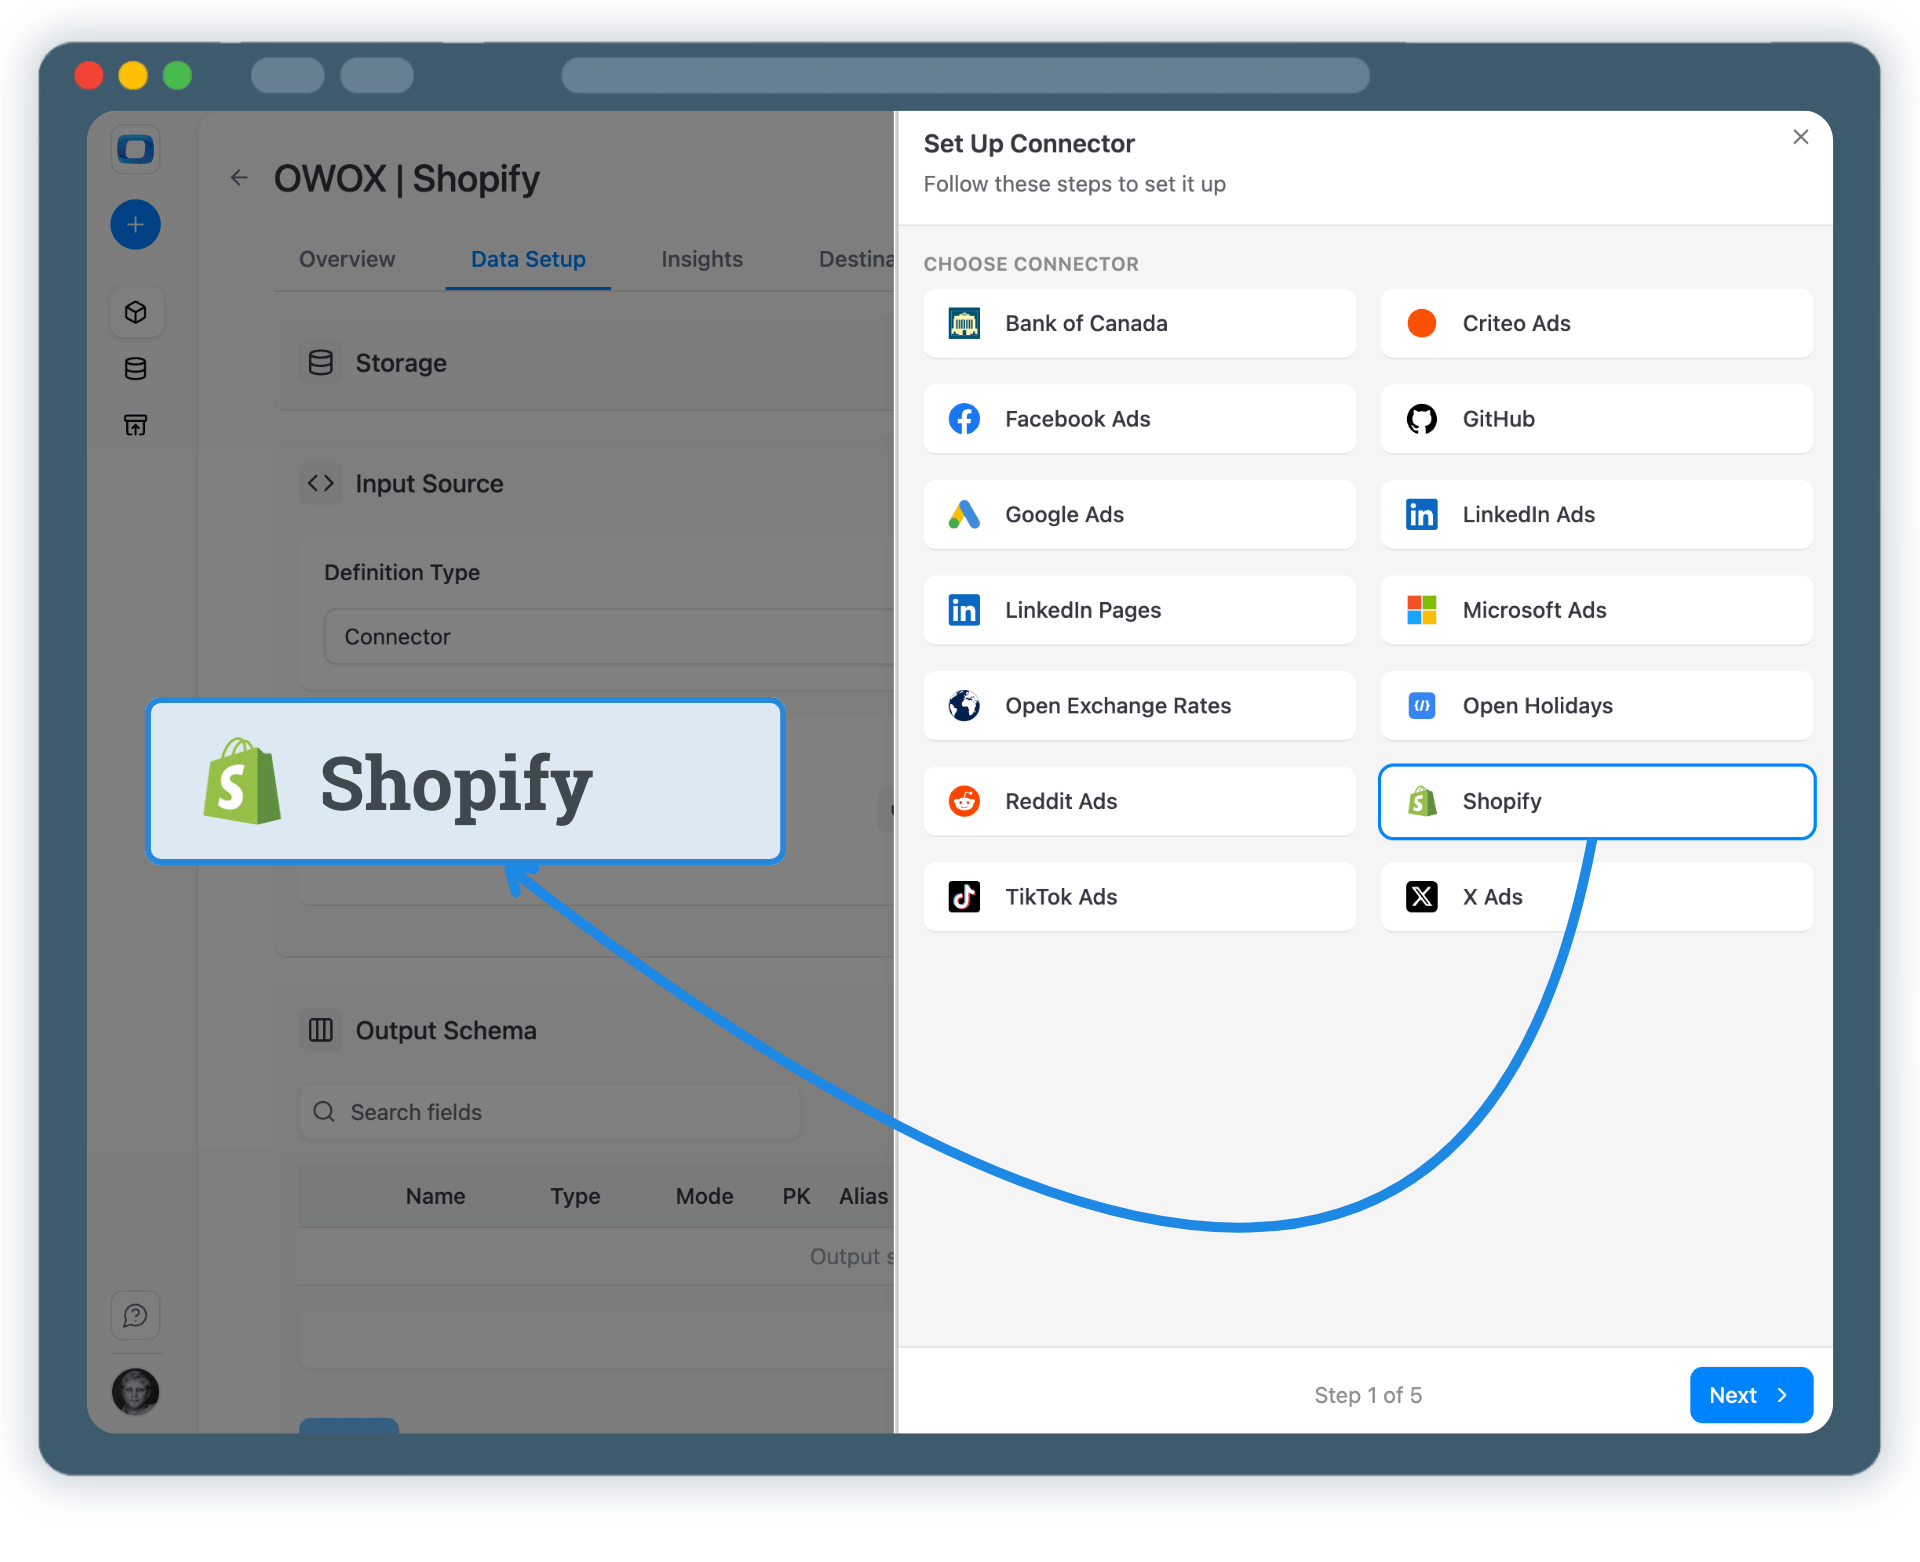
Create a new Data Mart and choose Connector as the definition type.

  • Select Shopify as the data source
  • Authorize access to your Shopify store by adding a Shop Domain and the Admin API Access Token
  • Define which e-commerce entities you want to collect

This Data Mart defines your Shopify logic once and makes it reusable.

Note: You can blend collect data together without a SQL-based data mart afterwards.

Step 2: Create Shopify Data Mart(s)
Create Data Mart
Request a demo

Step 3: Select Shopify Database & Fields

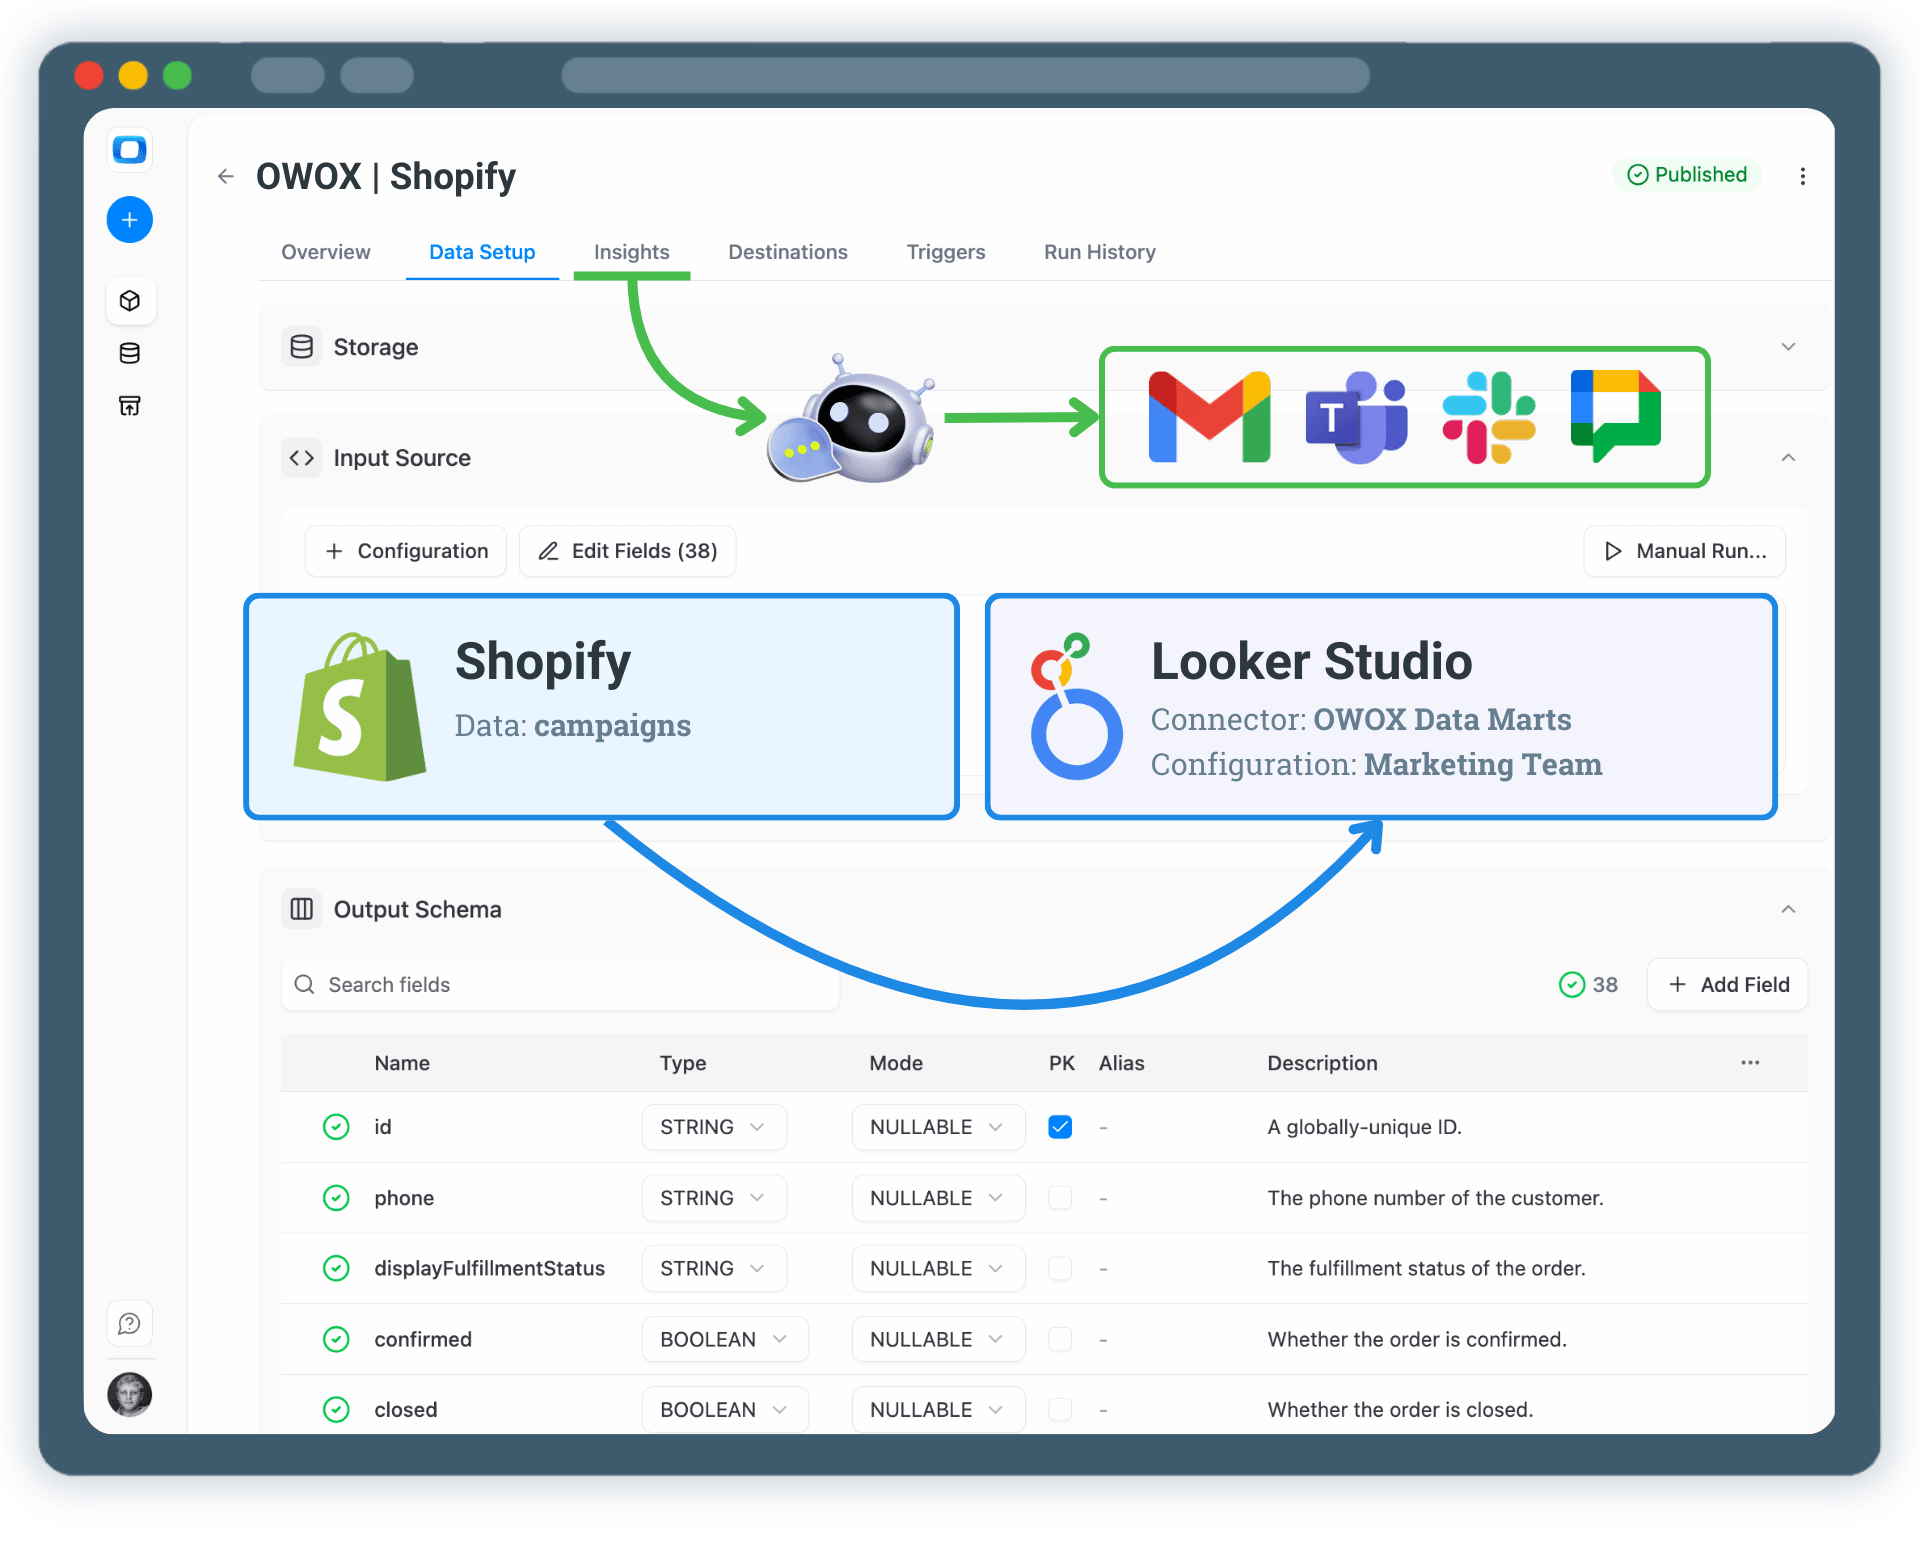
Choose exactly which Shopify data should be collected.

  • Select entities such as orders, order items, products, customers, and refunds
  • Define the dataset and table where data will be stored
  • Publish Shopify Data Mart once configuration is complete
  • Run manually & select Backfill to load historical data
  • Add a Connector run Trigger so Shopify data is collected on your schedule.

No worries, you can collect more Shopify data later on & blend them to get extraordinary reporting granularity.

Step 3: Select Shopify Database & Fields
Collect Shopify Data
Step 3: Select Shopify Database & Fields
Run & Schedule Shopify Data Collection

Run & Schedule Shopify Data Collection

Now it's time to enable your Shopify data in Looker Studio

  • Add Looker Studio as a Destination & paste the JSON into Looker Studio
  • Then just tik the box in the Destinations section of a data mart
  • From now on, your Shopify Data Mart is available from Looker Studio as a configuration

The data is going to be refreshed automatically.

Run & Schedule Shopify Data Collection
Enable Shopify Data
Request a demo

Step 5: Get more from your Shopify Analytics

Your Shopify data is now available for analysis in Looker Studio. But why stop at just this?
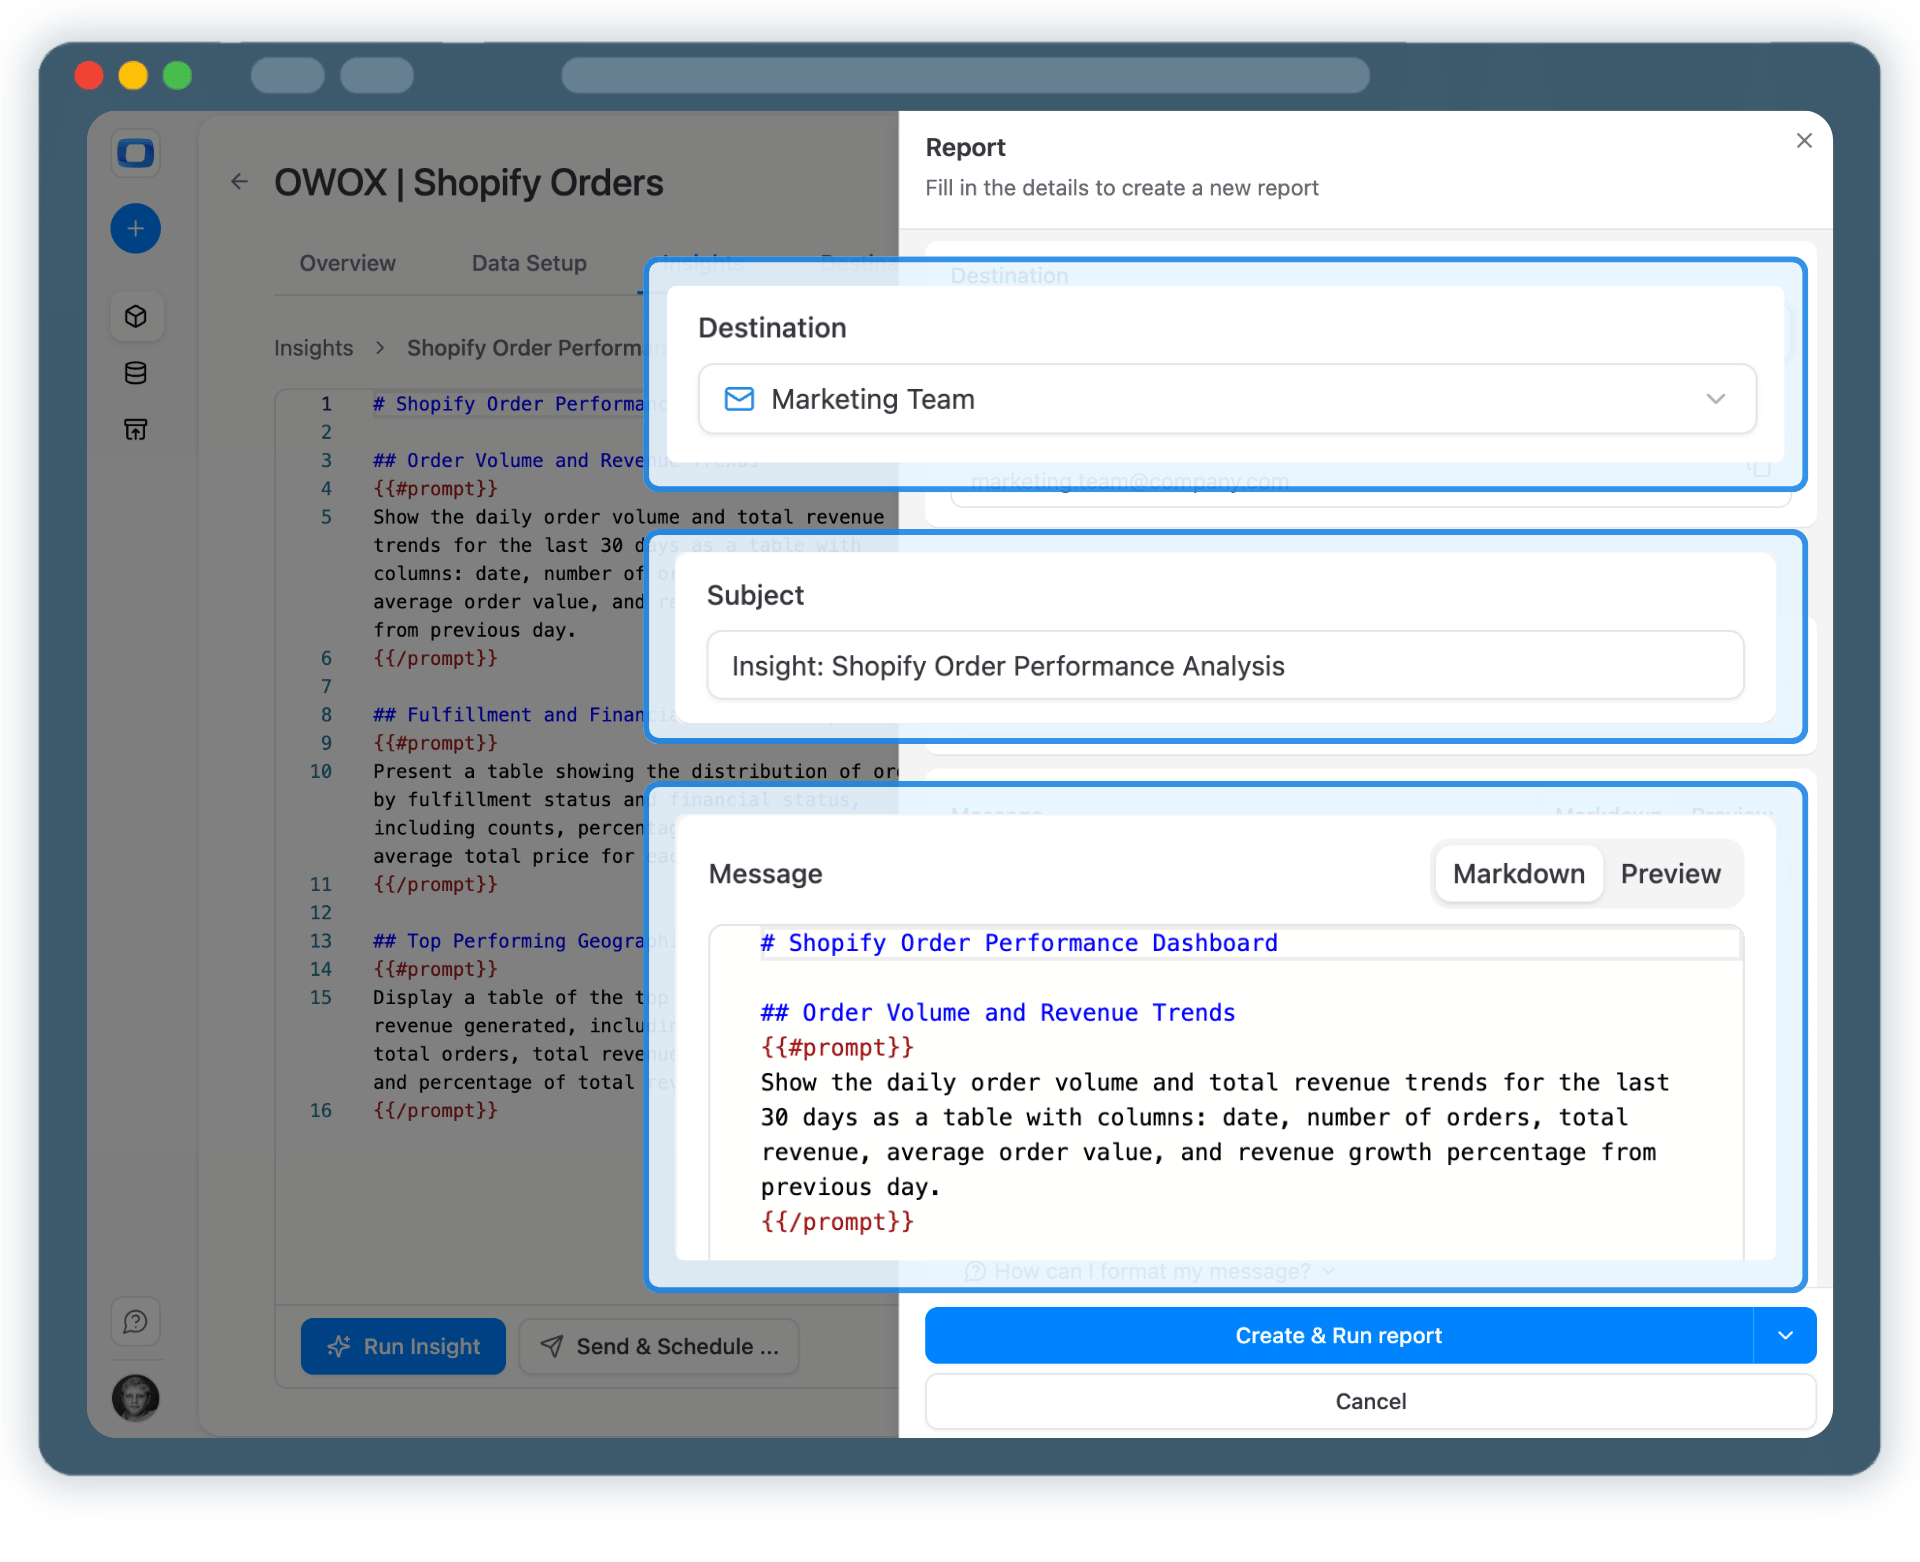
 You can reuse the same Shopify Data Mart to:

  • Build revenue, orders, and product performance reports
  • Blend Shopify data with ad platforms, GA4, or CRM data
  • Enable Shopify Analytics AI Insights delivered on a schedule to Slack, MS Teams or by Email
  • Just go to Insights tab, use our smart prompt, customize it or start from scratch

One e-commerce dataset – multiple use cases

Step 5: Get more from your Shopify Analytics
Send Data to Sheets
Step 5: Get more from your Shopify Analytics

Turn Shopify Data into Better Business Decisions

Schedule a quick walkthrough to see how OWOX Data Marts helps you:

  • Visualize & Analyze Shopify Data in Looker Studio
  • Deliver trusted insights to business teams
  • Reduce reporting chaos & manual work
  • Scale analytics without adding complexity
Also, on this call, you’ll learn how data teams utilize AI Insights to always deliver what matters the most
Turn Shopify Data into Better Business Decisions